Microsoft OAuth
Learn how to set up OAuth with Microsoft.
To configure your global Microsoft OAuth setup, you’ll need three pieces of information: a Redirect URI, a Microsoft Client ID, and a Microsoft Client Secret.
WorkOS provides the Redirect URI and an allowlisted callback URL. It indicates the location to return an authorized user to after both an authorization code is granted, and the authentication process is complete. It’s readily available in your Configuration Settings in the WorkOS Dashboard.
Simply open your WorkOS Dashboard, click the “Configuration” tab on the left hand nav bar. Scroll down to the “Microsoft OAuth” section and select “Setup Microsoft OAuth”. You’ll then see the Redirect URI as well as the fields you’ll populate later with information from Microsoft.

If you haven’t already, be sure to register an application with Microsoft following their documentation.
IMPORTANT: When registering your app, select “Accounts in any organizational directory (Any Azure AD directory – Multitenant) and personal Microsoft accounts (e.g. Skype, Xbox)” for “Supported Account Types”.
Then, you’ll provide the Microsoft Client ID and the Microsoft Client Secret to the WorkOS Dashboard Configuration. These are a pair of credentials provided by Microsoft that you’ll use to authenticate your application via Microsoft’s OAuth protocol. To obtain them:
Log in to the Microsoft Azure Portal. Select “Azure Active Directory” from the left hand navigation. Then select “App registrations” and select your relevant application.

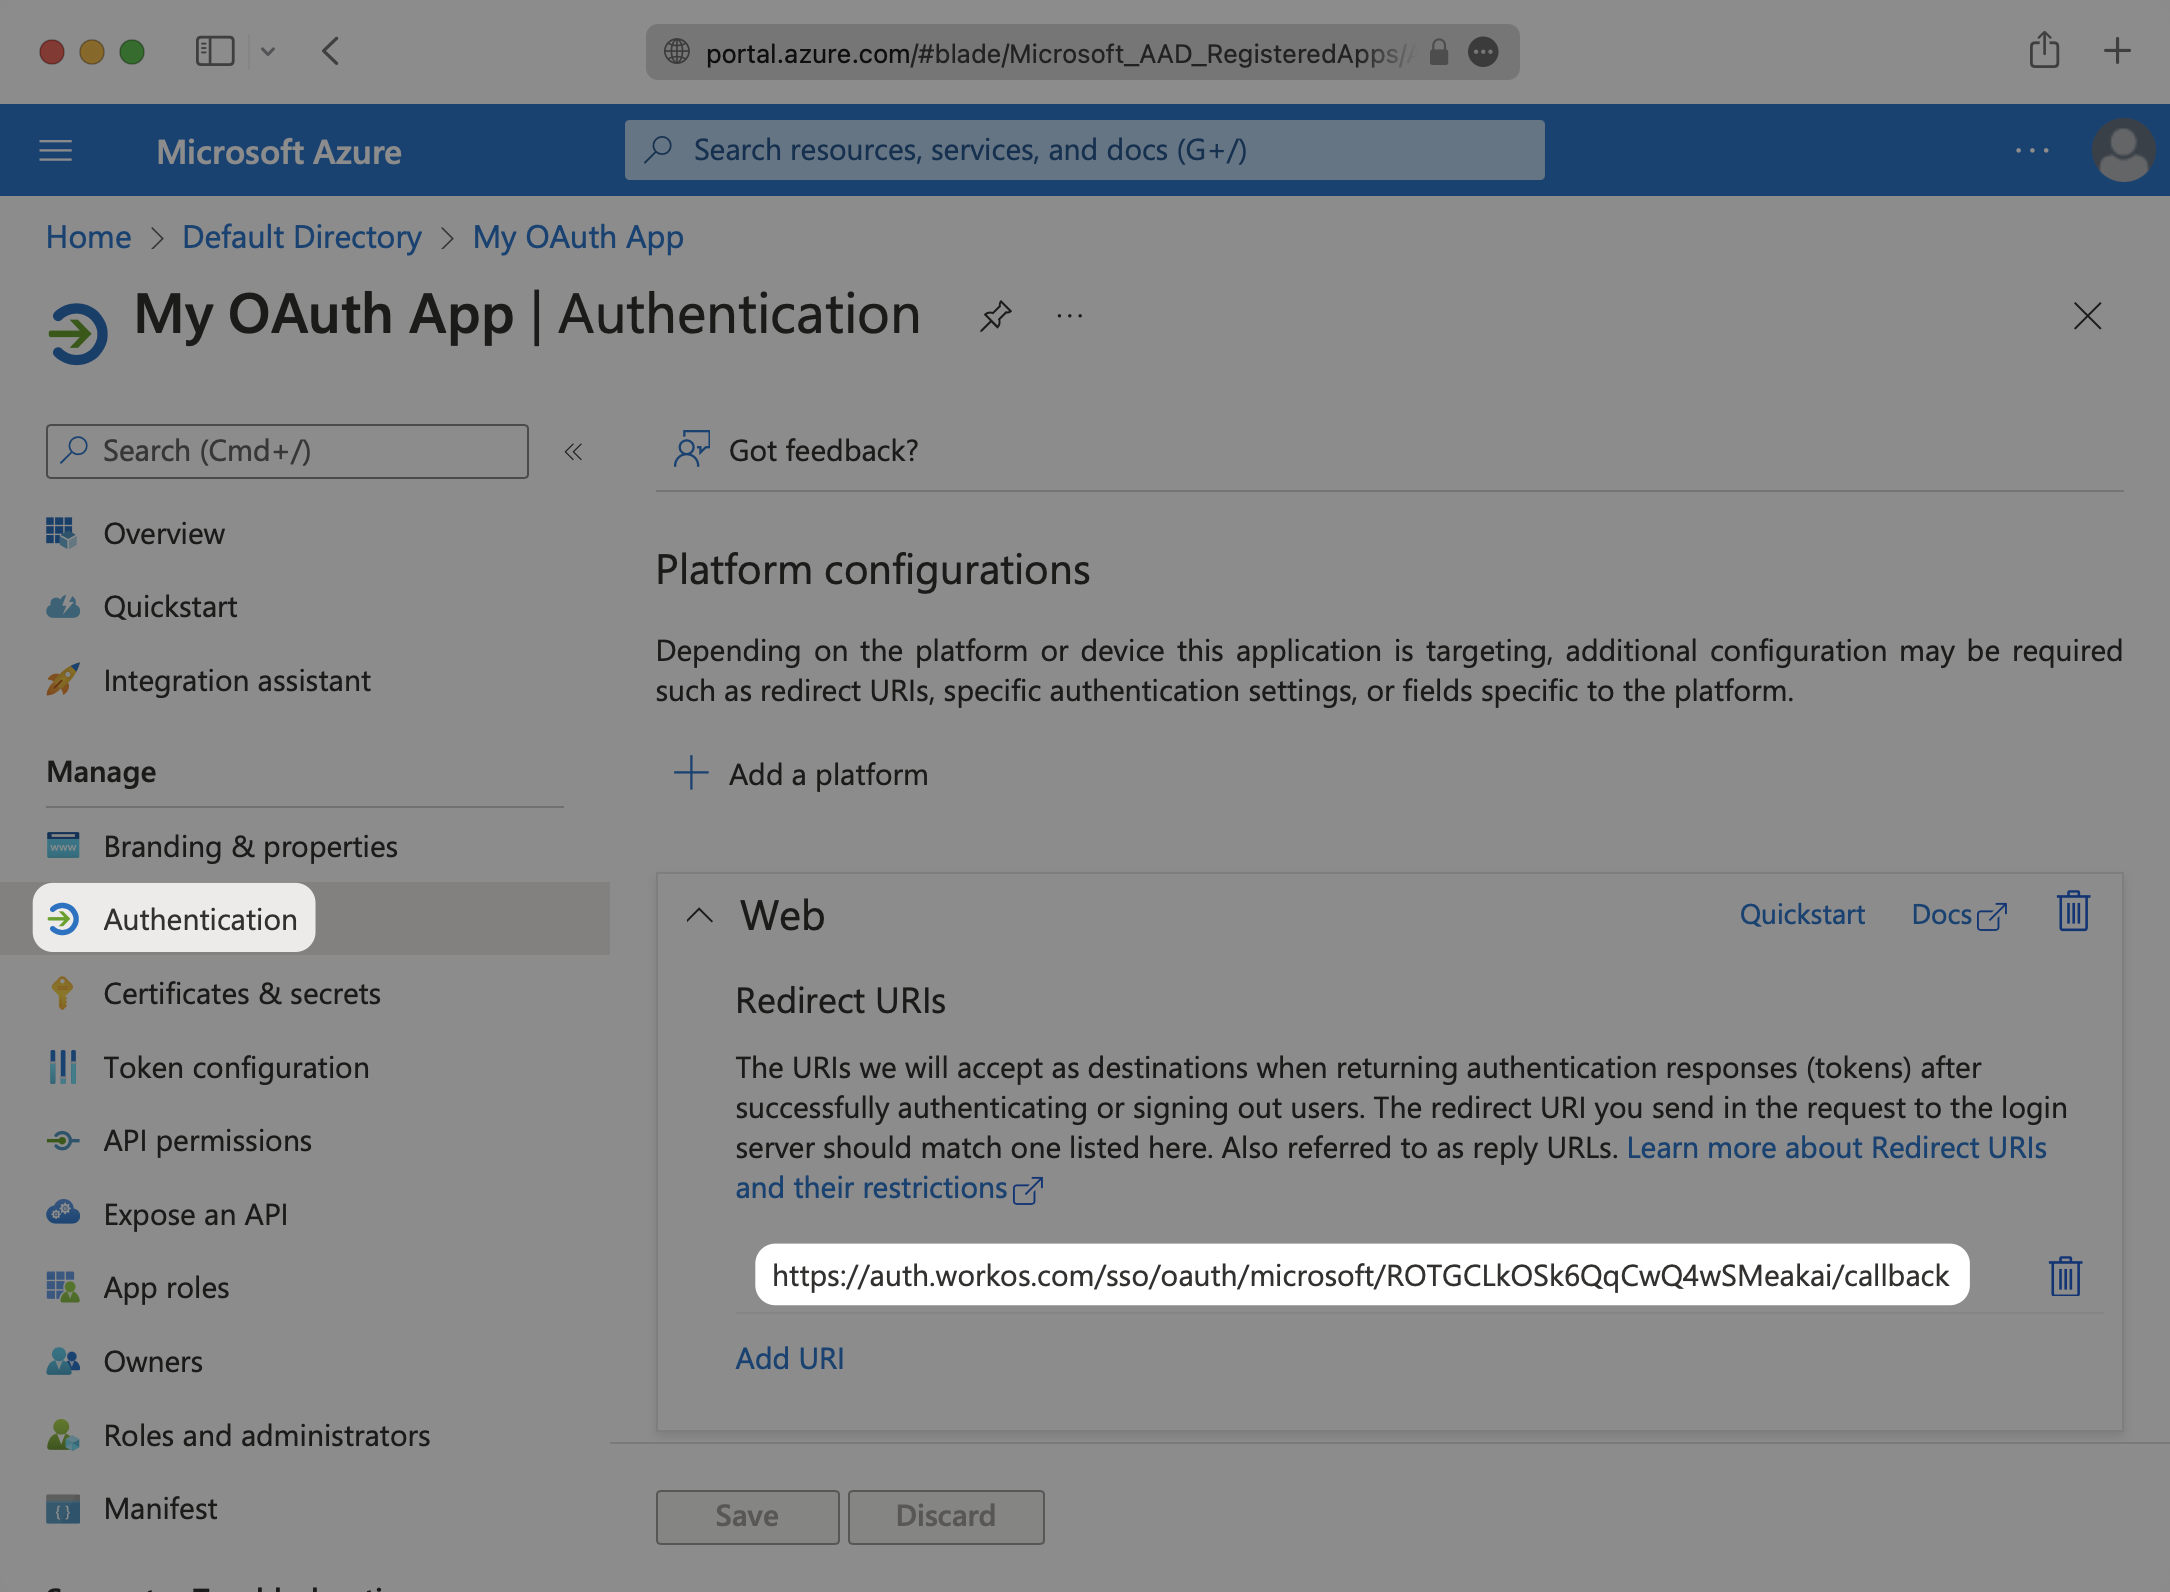
Select the “Authentication” option for the application. In the “Redirect URIs” section, add the Redirect URI provided for you in the Microsoft OAuth section of the WorkOS Dashboard Configuration.
Under “Token configuration”, select “Add optional claim”. Select email, family_name and given_name.
In order for the email claim to come through, the “Email” field for the user in Azure needs to be populated.

You’ll need to add your Microsoft Client ID and Microsoft Client Secret to their respective fields in your Microsoft OAuth settings.
To get your Microsoft Client Secret, navigate to “Certificates & secrets” and click on “New client secret”. Give your client secret a Description and select “Add”.
Microsoft’s client secrets have an expiration date, with the highest value being 24 months. You will need to track these and rotate them before the expiration time.

Copy your new client secret to the clipboard in order to add it to the WorkOS Dashboard.

To obtain the Microsoft Client ID, navigate to the “Overview” tab of your application and copy the “Application (client) ID”.

In the Microsoft OAuth section of your WorkOS Dashboard Configuration, click “Edit Microsoft OAuth”.

Add the Microsoft Client ID and Microsoft Client Secret and click “Save Microsoft OAuth”.

After that, you’re now able to authenticate users with Microsoft OAuth. Provide the provider parameter when authenticating Microsoft OAuth users, because Microsoft OAuth does not take a user’s domain into account when logging in with a “Sign in with Microsoft” button. You will use the provider query parameter in the Get Authorization URL API endpoint to support global Microsoft OAuth for any domain. The provider query parameter should be set to MicrosoftOAuth.